
How to Get a Police Clearance, From Sign-Up to Claiming
Here’s how to get police clearance in the Philippines in five stages: open an account on the PNP’s portal, book a slot, pay online, visit the station once, then pick up the printed clearance before you go home. Most people finish within a week, and almost all of it happens on a phone.
Last checked: 29 October 2026. Sources: the official portal and the PNP’s application guide.
| Item | Answer |
|---|---|
| Where you apply | pnpclearance.ph, the PNP’s own portal |
| Fee | ₱150, plus a small charge from your payment channel |
| What you bring | One valid ID, your reference number, proof of payment |
| When you get it | The same day, unless the records check finds a HIT |
| How long it lasts | Six months, counted from the issue date |
One note before you start: we’re an independent guide with no ties to the PNP. You’ll only ever type your details into the official portal.
What you need to get a police clearance
The online stages take roughly 20 minutes, but only if the right things sit beside you. So gather these first:
- An email inbox you can open right now
- The government-issued ID you’ll show at the station
- Your full address, including barangay and province
- Your mother’s and father’s full names, plus your date and place of birth
- A way to pay: a bank card, GCash, Maya, or cash over the counter
- One weekday you can spend partly at a police station
How to get police clearance in five stages
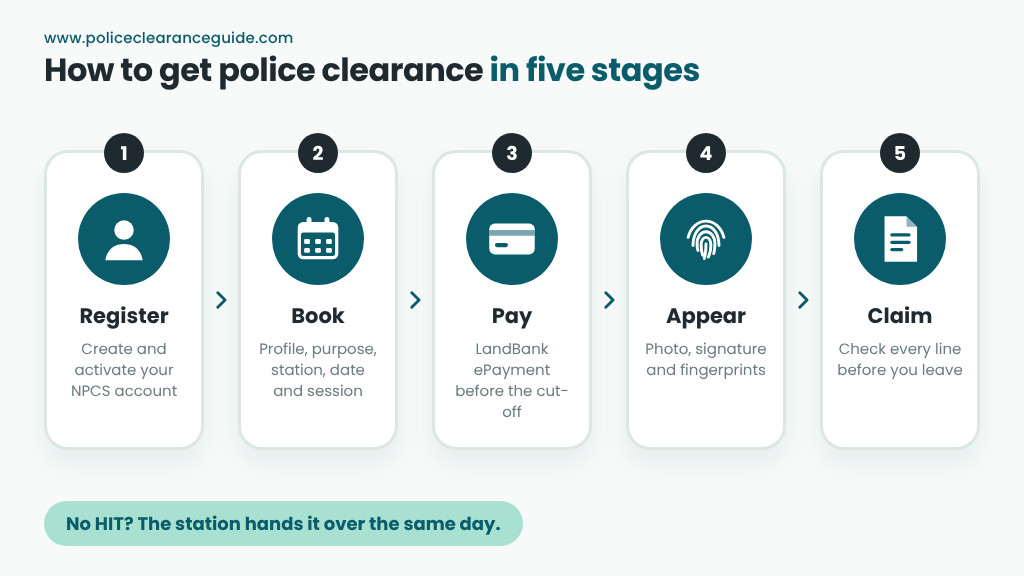
The police clearance process runs in five stages, and people often call them the 5 steps in securing police clearance. Each stage depends on the one before it, so do them in order.
Step 1: Create your NPCS account
Open the portal, click Register and accept the terms. Then fill in the short sign-up form, and type your name the way it appears on your ID, letter for letter. After that, open the activation email and click the link, because a new account can’t sign in until you do. Our walkthrough on how to set up your account covers each screen.
Step 2: Complete your profile and reserve a slot
Sign in and open Edit Profile. Whatever you type here ends up on the printed clearance, so proofread it before you press Save. If a field puzzles you, the application form guide explains each section.
Next, open Clearance Application and choose your purpose. Choose a station, then a date and an AM or PM session. When you save, your application for police clearance gets a reference number. Take a screenshot of it right away.
Step 3: Pay before the cut-off
Click the payment link and finish on LandBank’s ePayment page. You can pay by card, by e-wallet, or with cash at a store such as 7-Eleven. Keep the confirmation slip or e-receipt, since it’s your proof at the station. Also, pay early. An unpaid booking can be dropped two banking days before your slot.
Step 4: Appear at the station for biometrics
Get there before your session opens. Hand over your ID, reference number and payment proof at the clearance desk. Next, staff capture three things: a photo, a digital signature and your fingerprints. The photo prints on the clearance, so check what to wear first.
Step 5: Claim and check your clearance
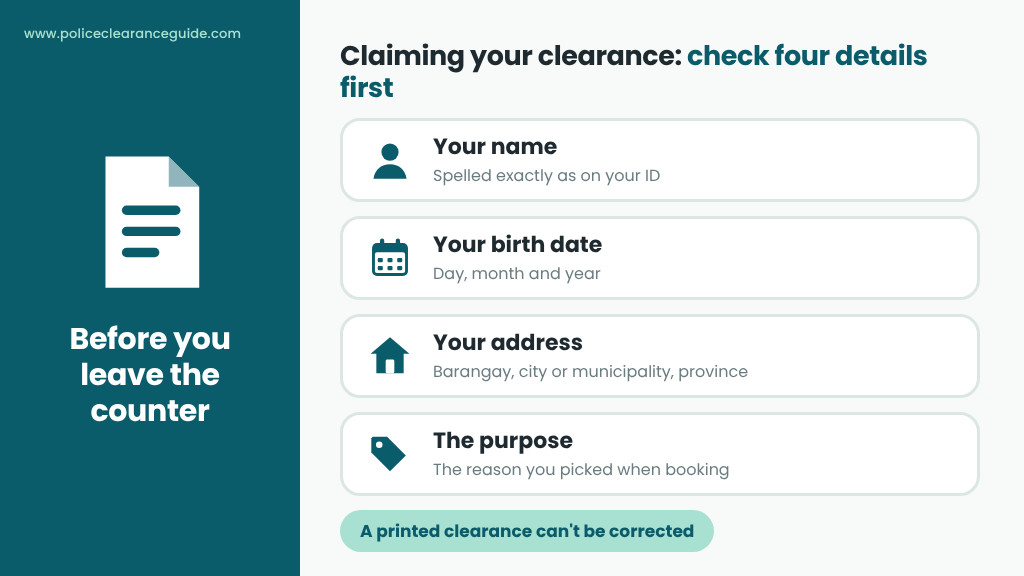
After the capture, the system checks your record. With no HIT, staff call your name and hand you the printed paper. That’s how to claim police clearance on the same day. Before you walk away, read every line: your name, birth date, address and purpose. If something is wrong, say so at the counter, because nobody can correct a clearance once it’s printed.
If the check flags a HIT, a verification officer reviews the match first. The desk then tells you whether to wait or come back. Our HIT explainer covers the details.
Which police clearance application fits you?
How to apply for police clearance depends on where you stand. The five stages above suit most people, but your route can differ:
- It’s your first national police clearance application. Follow all five stages. That’s how to get national police clearance from scratch.
- You completed one in person in the past three years. You may skip the station with a renewal without appearance.
- You live or work abroad. The portal’s Clearance Certification route lets you apply remotely.
- An office asked for a local clearance. That’s a different paper from a town’s own station, and our page on local clearances explains when it’s enough.
Police clearance cost and timing
You pay ₱150 for the clearance itself. Your chosen payment channel then adds a small service charge, and the payment page shows the exact total before you confirm. If this is your first job, the barangay’s First Time Jobseeker certification makes one clearance free. Our fee breakdown lists what each payment channel adds.
Timing depends mostly on your slot:
- Sign-up, profile and booking: about 20 to 30 minutes
- Payment posting: minutes for cards, sometimes longer for partner stores
- Station visit: a few minutes of capture, plus the queue
- Release: the same day without a HIT; longer with one
Working out how to secure police clearance before a job deadline? Book the earliest slot you can keep, and pay on the same day. For exact numbers in each case, see how many days it takes.
Police clearance application mistakes that cost a trip
Most second visits trace back to the same few slips:
- A nickname in the profile. Type “Juanito” if your ID says Juanito, not “Jun.”
- The wrong purpose. First-time jobseekers who skip that purpose pay the full fee.
- Booking without paying. The slot can disappear before your date.
- A copy of your ID, or one that has lapsed. Staff need the original card, and it must still be in date.
- Opening a second account. Use Forgot Password on the old one instead, since the first account holds your records.
- Skipping the final check. Errors found after you leave mean a new application and a new fee.
Quick answers
| Question | Short answer |
|---|---|
| How do I get a police clearance? | Register on pnpclearance.ph, book a slot, pay online, then go to the station once for your photo and fingerprints. |
| What are the 5 steps in securing police clearance? | Create an account, fill in your profile and book, pay, appear for biometrics, then claim and check the clearance. |
| How long does it take? | Usually under a week from sign-up, with one station visit. |
| Can I claim it the same day? | Yes, if the records check finds no HIT. With a HIT, the station gives you a later release. |
| Can someone else claim it for me? | Not for a regular application. You must appear yourself, since your biometrics are taken that day. |
Your next step
Learning how to get a police clearance takes five minutes, and doing it takes about a week. So start with the account, because every later stage hangs on it. Open the portal on your phone, keep your ID beside you, and follow our walkthrough to set up your account the right way. Our main police clearance guide has the bigger picture.
